
AWS Amplify: All in One Framework that you need
Full Stack Text Summarizer in VueJS and NodeJS with AWS Amplify Framework: CLI, UI, Authentication API, Serverless Functions and Deployment


Background
Amazon Amplify is a framework for building full-stack applications within no time. It can be integrated with various frameworks and libraries for Mobile, Web and Desktop Application Development including JavaScript, iOS, Ionic, Flutter, React, Vue and many more.
In this article, We are going to learn How to use AWS Amplify for Developing a Full Stack Text Summarization Application in which we'll include Amplify CLI, Auth, UI Library, API, Serverless Functions, Deployment, and Debugging of Application.
Prerequisites
- Amazon AWS Account
- System from where you can access your AWS account
Installation
Install vue-cli and create vue project.
npm install -g @vue/cli
vue create ml-with-amplify
// select vue3 version
cd ml-with-amplify
This was the front end of our project. Now we'll set up backend API and services for our project.
Install the Amplify CLI.
The Amplify CLI is a command line toolchain that runs locally in order to communicate with your app backend.
npm install -g @aws-amplify/cli@latest
// OR with npm
curl -sL https://aws-amplify.github.io/amplify-cli/install | bash && $SHELL
Install & Configure Amplify UI
To install Amplify UI with Vue integration run the below command,
npm i @aws-amplify/ui-vue aws-amplify
Edit src/main.js file and add below content.
import { createApp } from "vue";
import App from "./App.vue";
import './assets/style.css'
import AmplifyVue from "@aws-amplify/ui-vue";
import router from "./router";

const app = createApp(App);
app.use(router);
app.use(AmplifyVue);
app.mount("#app");
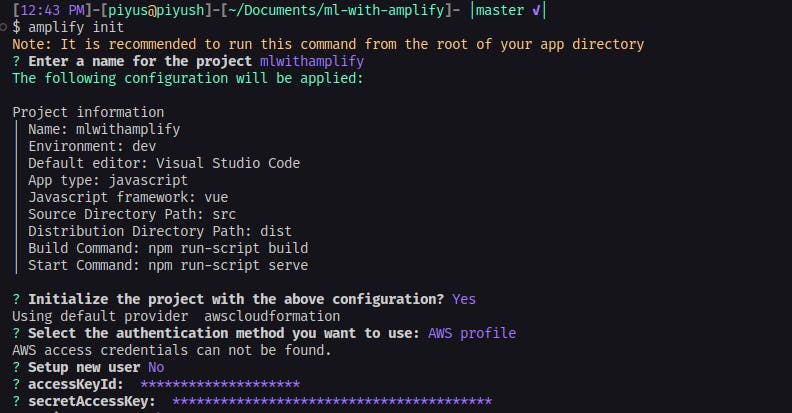
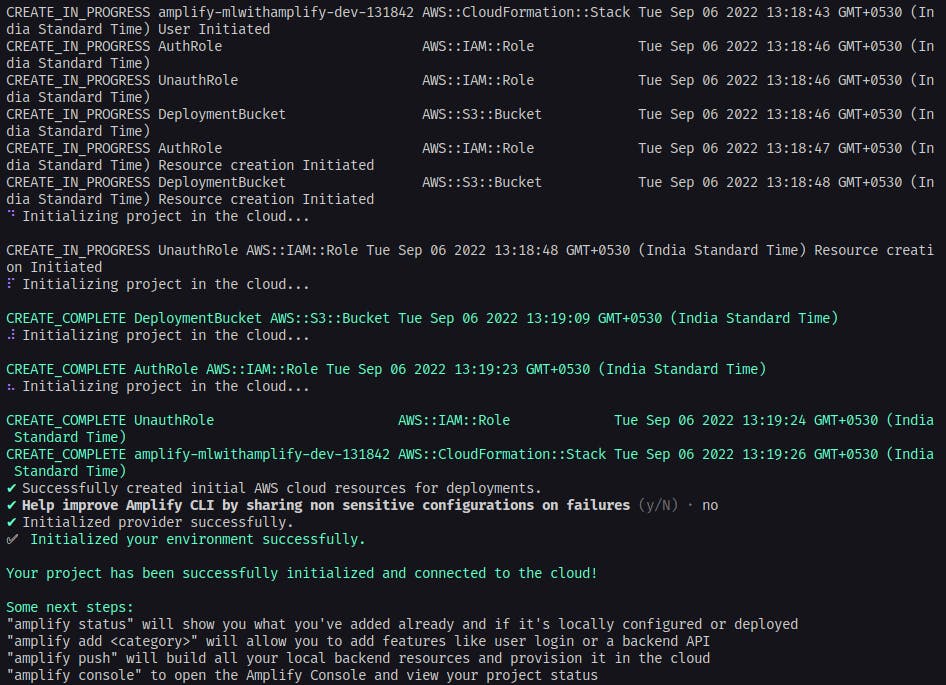
To set up amplify backend in our project, run the following command from your project's root folder (ml-with-amplify): you can customize the selections. See the output below.
amplify init
Add Auth
To set up Amplify Auth in our project run the below command and review selections.
amplify add auth
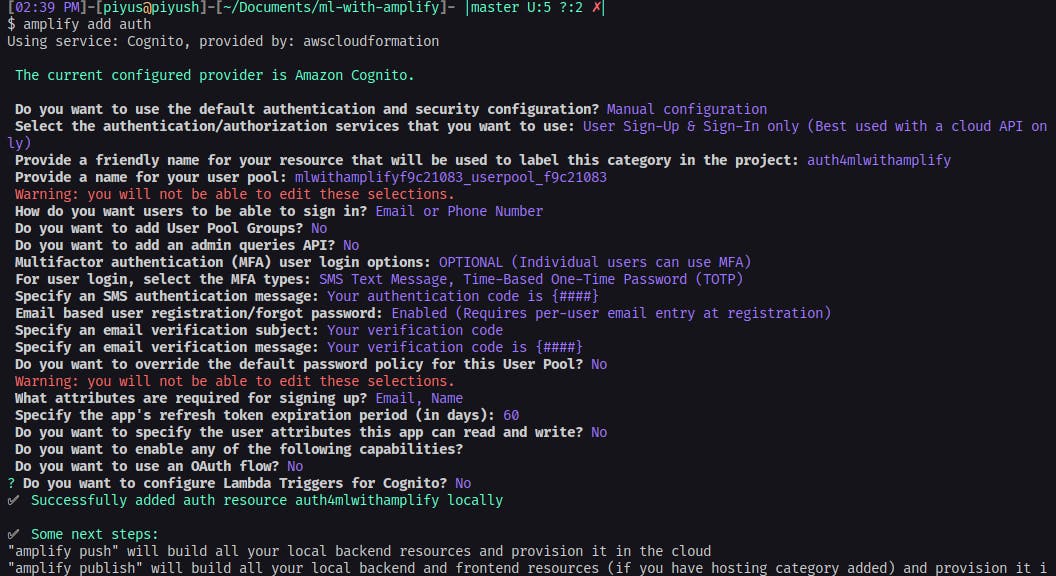
Amplify Auth uses Amazon Cognito for Auth mechanisms like Sign Up, Sign In and other Access Control. You can customize it as per your need.
Integrate Auth with Amplify UI
Edit src/App.vue
<template>
  <authenticator :form-fields="formFields">
    <template v-slot="{ user, signOut }">
      <template v-if="user">
        <AppHeader :user="user" :sign-out="signOut"></AppHeader>
        <router-view class="scrollbar" :user="user"></router-view>
      </template>
    </template>
  </authenticator>
</template>

<script setup>
import "@aws-amplify/ui-vue/styles.css";
import { Amplify, Auth } from "aws-amplify";
import awsconfig from "./aws-exports";
import AppHeader from "./components/app-header.vue";

Amplify.configure(awsconfig);
Auth.configure(awsconfig);

const formFields = {
  signIn: {
    username: {
      labelHidden: true,
      placeholder: "Enter your username",
      isRequired: true,
      label: "",
    },
  },
  signUp: {
    username: {
      labelHidden: true,
      placeholder: "Create username",
      isRequired: true,
      label: "",
    },
    email: {
      labelHidden: true,
      placeholder: "Enter Your Email Here",
      isRequired: true,
      label: "",
    },
  },
  resetPassword: {
    username: {
      labelHidden: true,
      placeholder: "Enter your username",
      isRequired: true,
      label: "",
    },
  },
};
</script>
Here we are Configuring Amplify Auth with awsConfig(aws-exports.js file) which is auto-generated by Amplify. We use component which is Amplify Auth component for Vue, which is used for Sign Up, Sign In, Reset Password, Social Login and Customization Auth Options. It can be customizable. Here in formFields object we are customizing Authenticator SignIn, Sign Up, and Reset Password Form's fields. In app-header.vue we have passed signOut method of the authenticator component to split functionality.
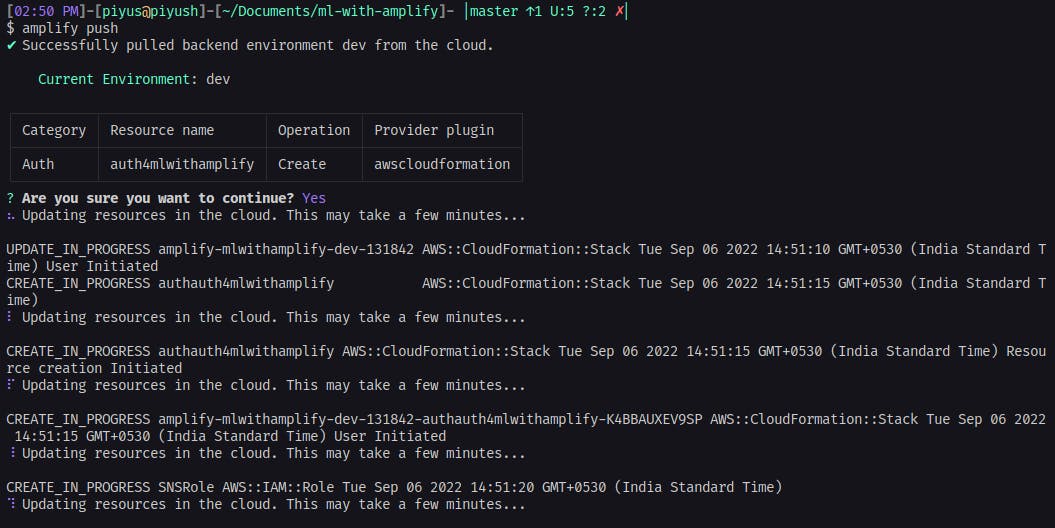
Push Deployment
Run the below command to deploy our frontend and backend app in the cloud in a single workflow.
amplify push
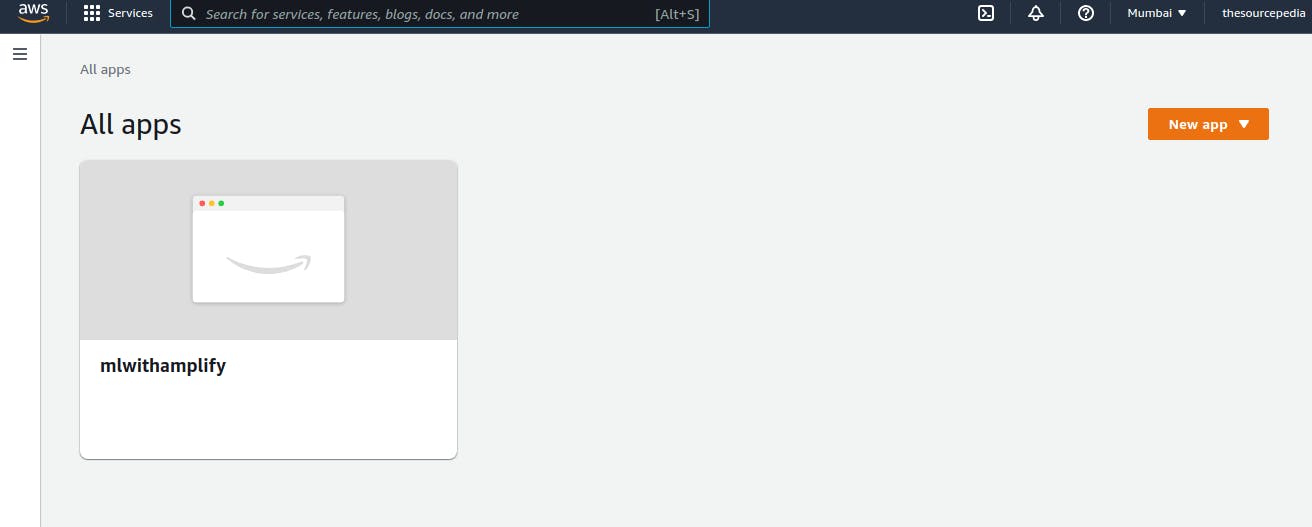
List all deployed apps in Amplify Console. You can create a new app from here.
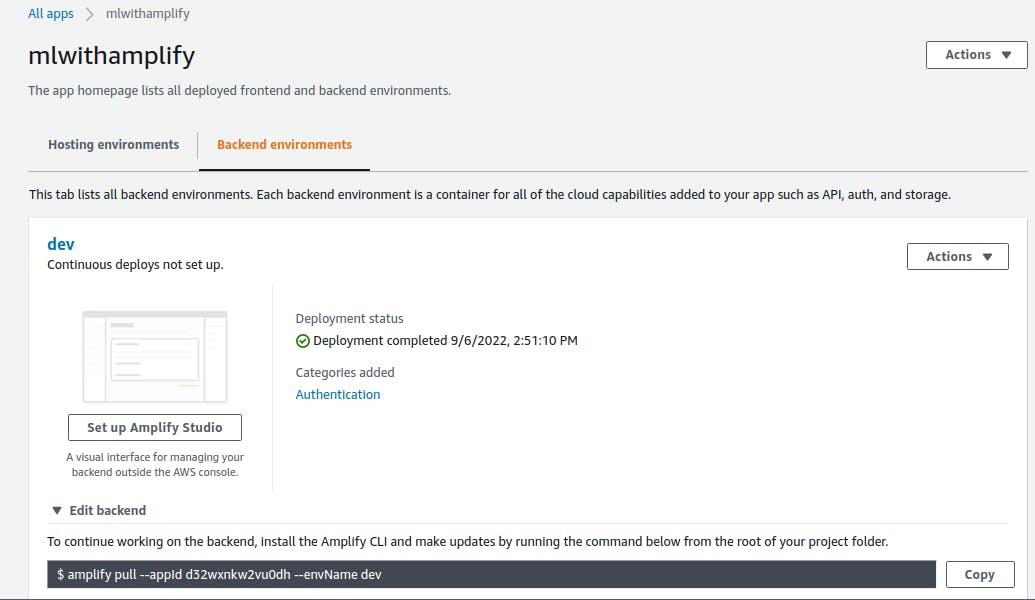
Review detailed view of our application's backend environment. Here you can see deployment details, Added categories, actions and commands to install this backend in a new project.
Connect Branch
In the Hosting environment section, you can connect any Git Version Control provider and connect the repository branch to link the code. Here we are selecting GitHub as a provider. Click Connect Branch.

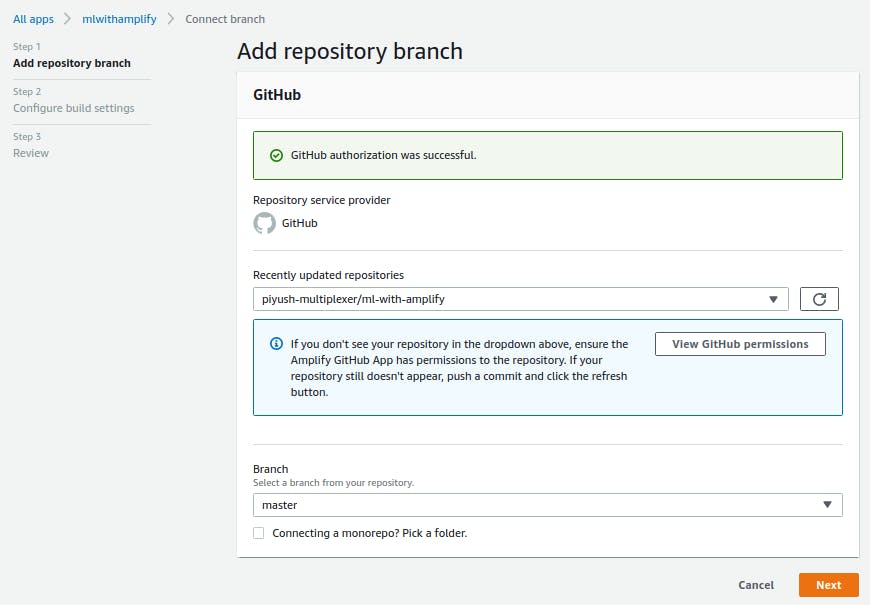
Add Repository
After successful authorization, we need to select the repository where our code is hosted and the name of the branch. Click Next.
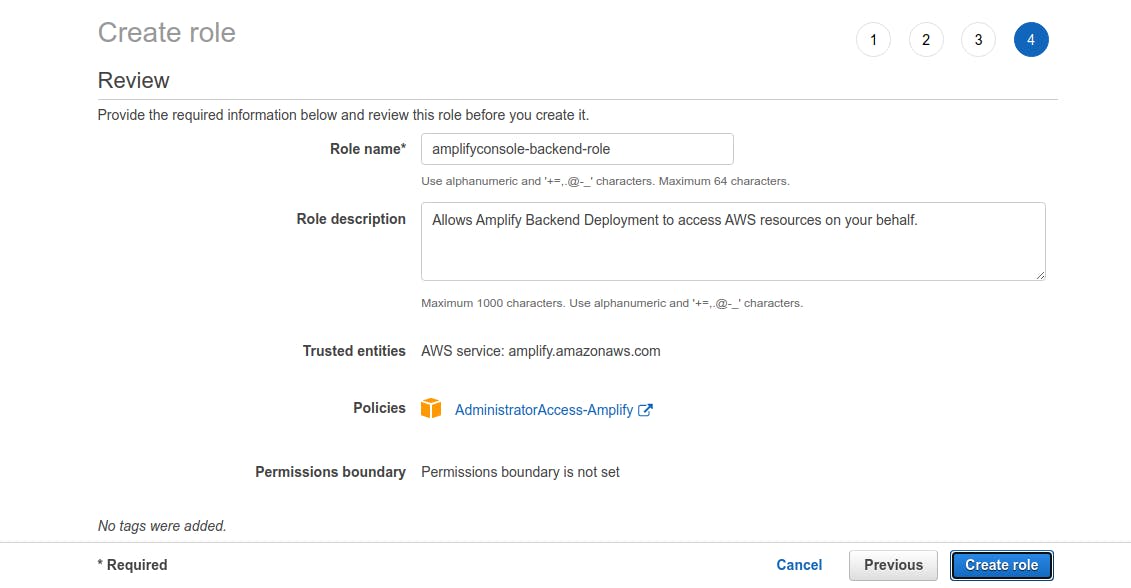
Create role
In this section, we need to create an AWS role to Allow Access to resources on our behalf so it can auto-create instances, and pools, and deploy them. After review click Create Role.
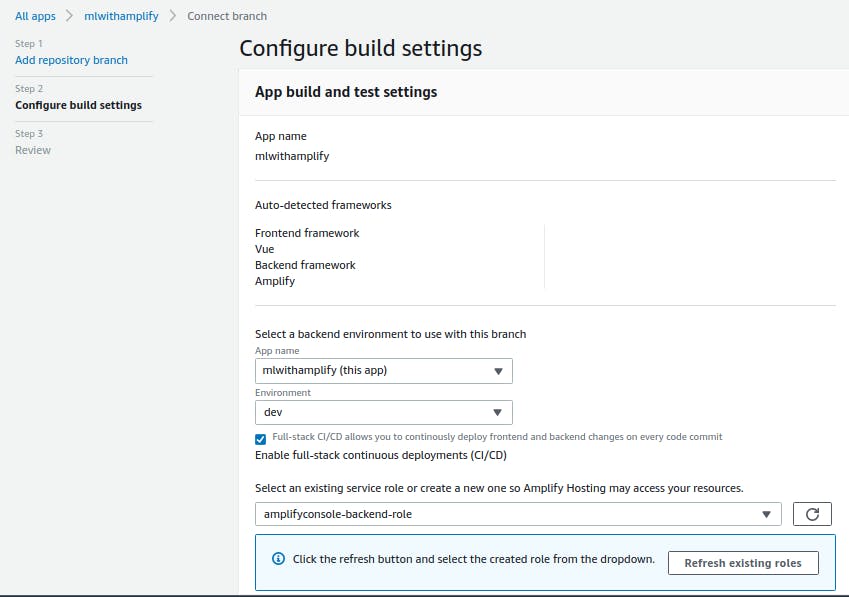
Build Settings
In this section you can configure the build section, it will auto-detect frameworks, here Vue is detected as Frontend Framework and Amplify as Backend. After the necessary configuration click next.
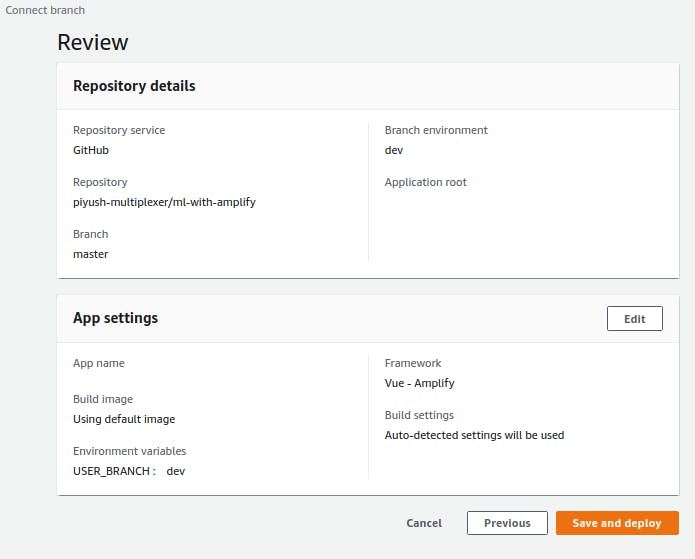
Review
Review final details and settings and all ok then click Save and deploy.
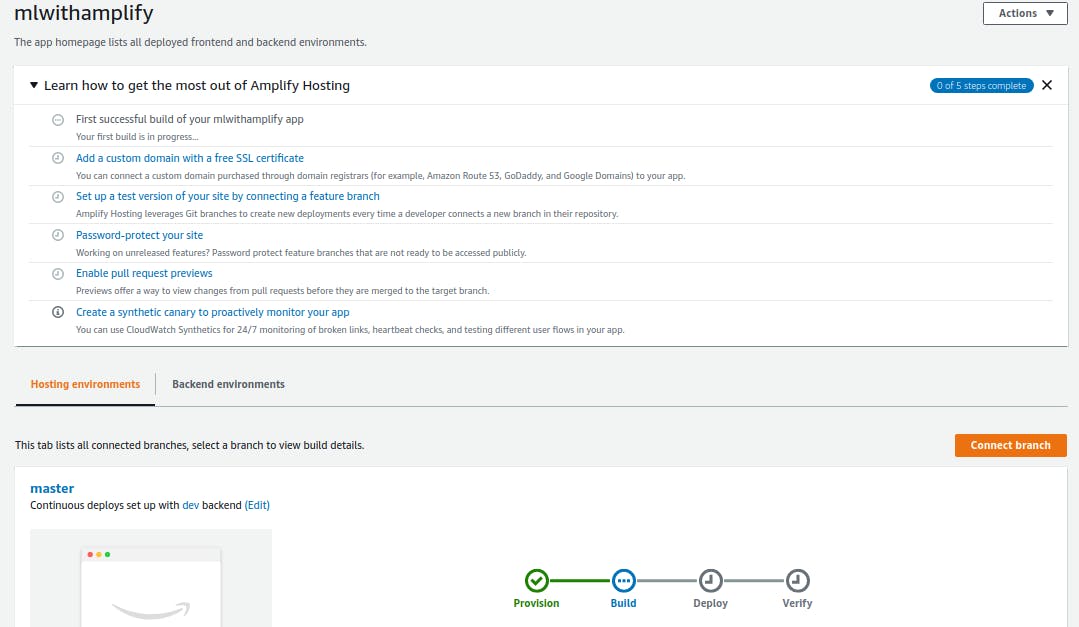
After deploying go back to the Hosting section app detail page, where you can see the pipeline is running with four steps which include Provision, Build, Deploy, and Verify. From here you can see deployment process steps, its logs, and perform various actions like adding a custom domain, password-protect site etc.
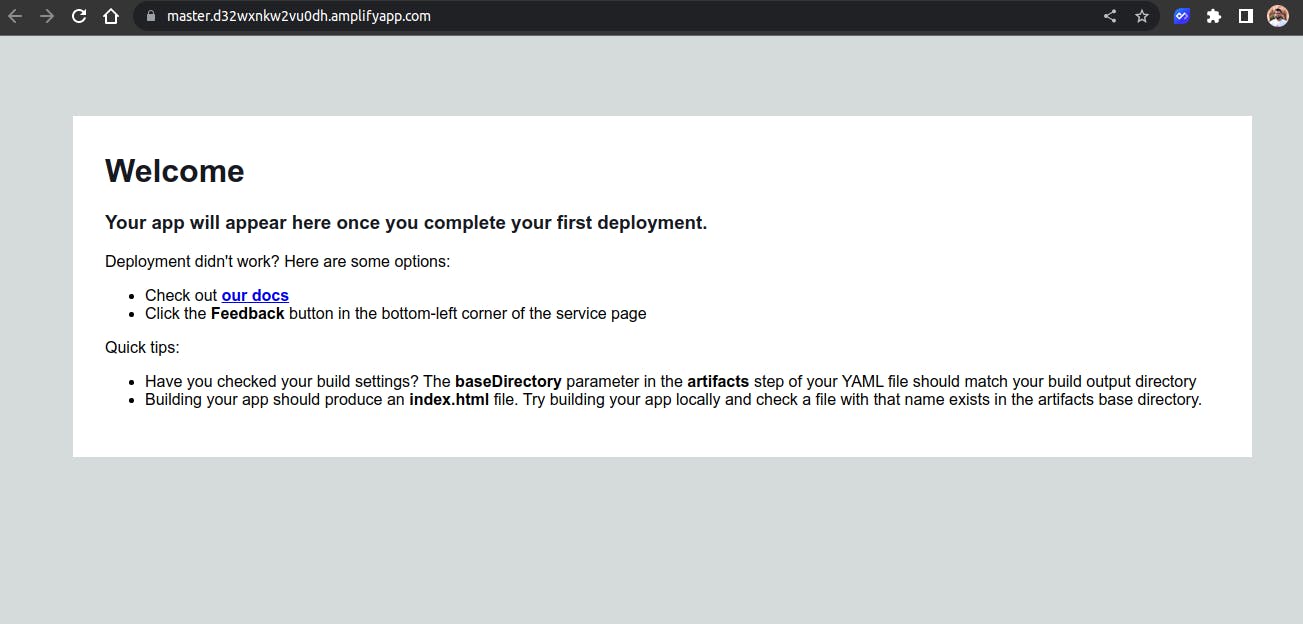
Once deployment is successful you'll see the URL where an app is hosted, click on URL. If it is still not reflected you'll see the below screen otherwise your app will be served.
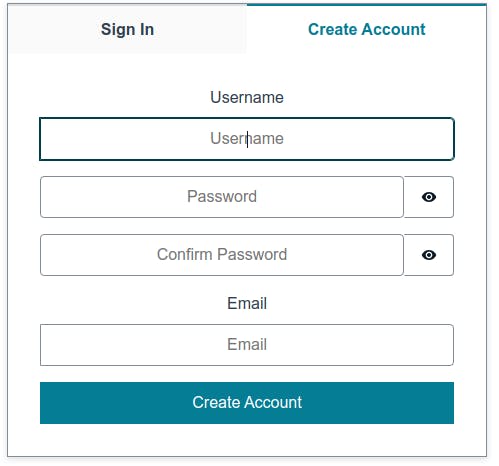
SignUp
Register a new user to access the site, Once you click Create account you'll receive a confirmation mail on your email.
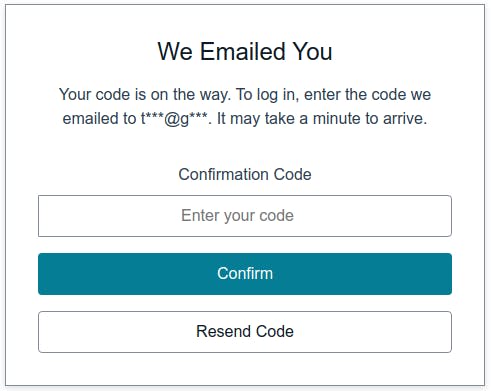
Enter the confirmation code that you received on the email to verify the email and complete registration, and then log in.
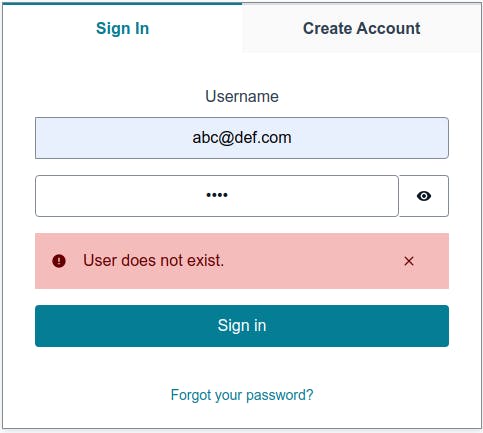
If you try to attempt login with the wrong credential you will see amplify will throw a respective error.
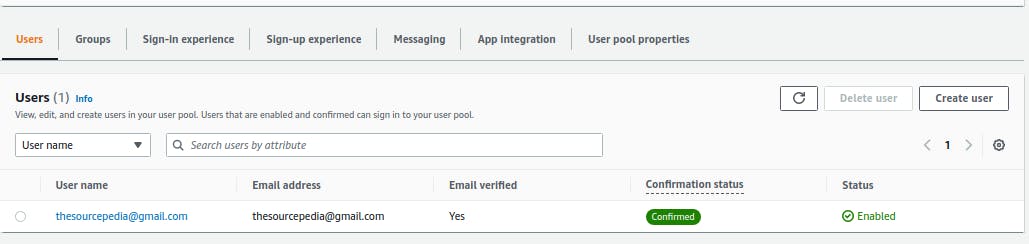
User Management
- Visit Amplify Studio Dashboard and Goto User Management Tab to view and manage Users.

- You can also see and manage Users in Cognito Dashboard.
Amplify API
Add Backend API
To add backend service run the below command.
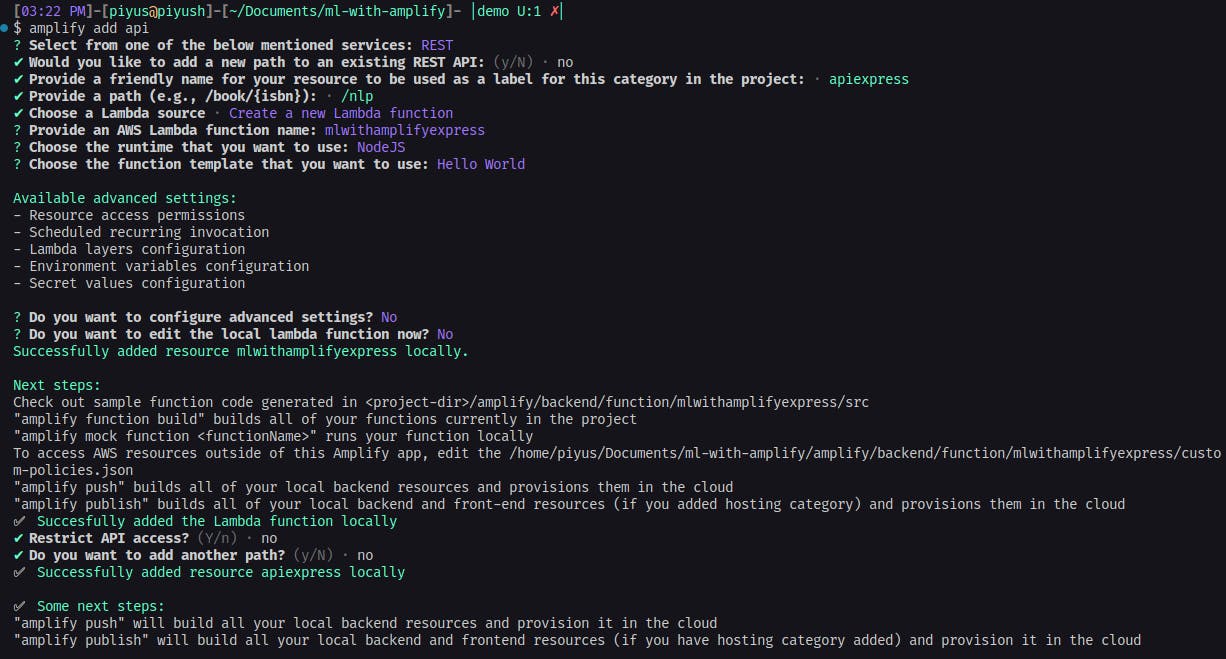
amplify add api
It will ask for the type of service REST/GraphQL, endpoint, name of a resource, path, lambda source, lambda function name, runtime, template and other advanced settings.
Provision resources
Once added locally push to the cloud for provisioning resources.
amplify push
It will create necessary resources like lambda instance, permissions, environment variables and configs, endpoints etc.
You can create a function URL from Lambda Dashboard as below from the Function URL tab which is optional though.

Remove API and De-provision Resources
To remove amplify API and lambda function run the below commands in the following order. First, you need to remove API and then the Lambda function because a function is dependent on API.
amplify api remove apiexpress
amplify function remove mlwithamplifyexpress

Text Summarization Logic
We have added a lambda function to get a summary of the text, which takes input from the front end and processes text in lambda and another custom external API and returns a response to the front end. Here is the function code.
/**
 * @type {import('@types/aws-lambda').APIGatewayProxyHandler}
 */

const stopwords = ["i", "me", "my", "myself", "we", "our", "ours", "ourselves", "you", "your", "yours", "yourself", "yourselves", "he", "him", "his", "himself", "she", "her", "hers", "herself", "it", "its", "itself", "they", "them", "their", "theirs", "themselves", "what", "which", "who", "whom", "this", "that", "these", "those", "am", "is", "are", "was", "were", "be", "been", "being", "have", "has", "had", "having", "do", "does", "did", "doing", "a", "an", "the", "and", "but", "if", "or", "because", "as", "until", "while", "of", "at", "by", "for", "with", "about", "against", "between", "into", "through", "during", "before", "after", "above", "below", "to", "from", "up", "down", "in", "out", "on", "off", "over", "under", "again", "further", "then", "once", "here", "there", "when", "where", "why", "how", "all", "any", "both", "each", "few", "more", "most", "other", "some", "such", "no", "nor", "not", "only", "own", "same", "so", "than", "too", "very", "s", "t", "can", "will", "just", "don", "should", "now"];

function remove_stopwords(str) {
  let res = [];
  let words = str.split(" ");
  for (let i = 0; i < words.length; i++) {
    let word_clean = words[i].split(".").join("");
    if (!stopwords.includes(word_clean)) {
      res.push(word_clean);
    }
  }
  return res.join(" ");
}
exports.handler = async (event) => {
  console.log("LAMBDA FUNTION INVOKED");
  const natural = require("natural");
  const fetch = require("node-fetch");
  let TfIdf = natural.TfIdf; // term-frequency inverse document frequency
  let tfidf = new TfIdf();
  const sent_tokenizer = new natural.SentenceTokenizer(); // sentence tokenizer
  const word_tokenizer = new natural.WordTokenizer(); // word tokenizer
  const body = JSON.parse(event.body);
  const doc = body.doc;
  console.log(`EVENT: ${JSON.stringify(event)}`);
  const sents = sent_tokenizer.tokenize(doc); // tokenize sentences
  let word_freq = {};
  // sentences without stopwords
  sents.forEach((sent) => {
    tfidf.addDocument(remove_stopwords(sent));
  });
  // remove stopwords from document
  let stopWRDoc = remove_stopwords(doc);
  let wordArr = [];

  wordArr = word_tokenizer.tokenize(stopWRDoc);

  // find frequency of words
  wordArr.forEach((word) => {
    if (!word_freq[word]) word_freq[word] = 0;
    if (wordArr.indexOf(word) === -1) word_freq[word] = 1;
    else word_freq[word] += 1;
  });

  // get maximum frequency
  const MAX_FREQ = Math.max(...Object.values(word_freq));

  // calculate weighted frequency
  Object.keys(word_freq).forEach((key) => {
    word_freq[key] = word_freq[key] / MAX_FREQ;
  });

  // calculate sentence scores
  let sent_scores = {};

  const word_freq_keys = Object.keys(word_freq);
  sents.forEach((sent) => {
    word_tokenizer.tokenize(sent.toLowerCase()).forEach((word) => {
      if (word_freq_keys.indexOf(word) !== -1) {
        // shorter sentence for summary X length
        if (sent.split(" ").length < body.sentLength) {
          if (Object.keys(sent_scores).indexOf(sent) === -1) {
            sent_scores[sent] = word_freq[word];
          } else {
            sent_scores[sent] += word_freq[word];
          }
        }
      }
    });
  });
  // get summary
  const summary = await fetch("https://heapq-api.vercel.app/nlargest", {
    method: "POST",
    headers: { Accept: "application/json", "Content-Type": "application/json" },
    body: JSON.stringify({
      size: 5,
      sent_scores: sent_scores,
    }),
  }).then((res) => res.json());

  return {
    statusCode: 200,
    headers: {
      "Access-Control-Allow-Origin": "*",
      "Access-Control-Allow-Headers": "*",
    },
    body: JSON.stringify({ flag: true, data: summary }),
  };
};
In this for text summarization and NLP(Natural Language Processing), we have used natural library which does basic Sentence and Word tokenization, finding Term Frequency Inverse Document Frequency(TfIdf).
In this, I have deployed the serverless function of Python library heapq API wrapper to find nlargest. I need to separate this in Python due to the erroneous and lack of compatibility in the NodeJS ecosystem that I have tried.
In this, you can enter a large paragraph/document in the left input box and get a summary in the right pane.
Register yourself better for auth flow understanding or use Demo Credentials
- Username: amplifydemo
- Password: amplifydemo
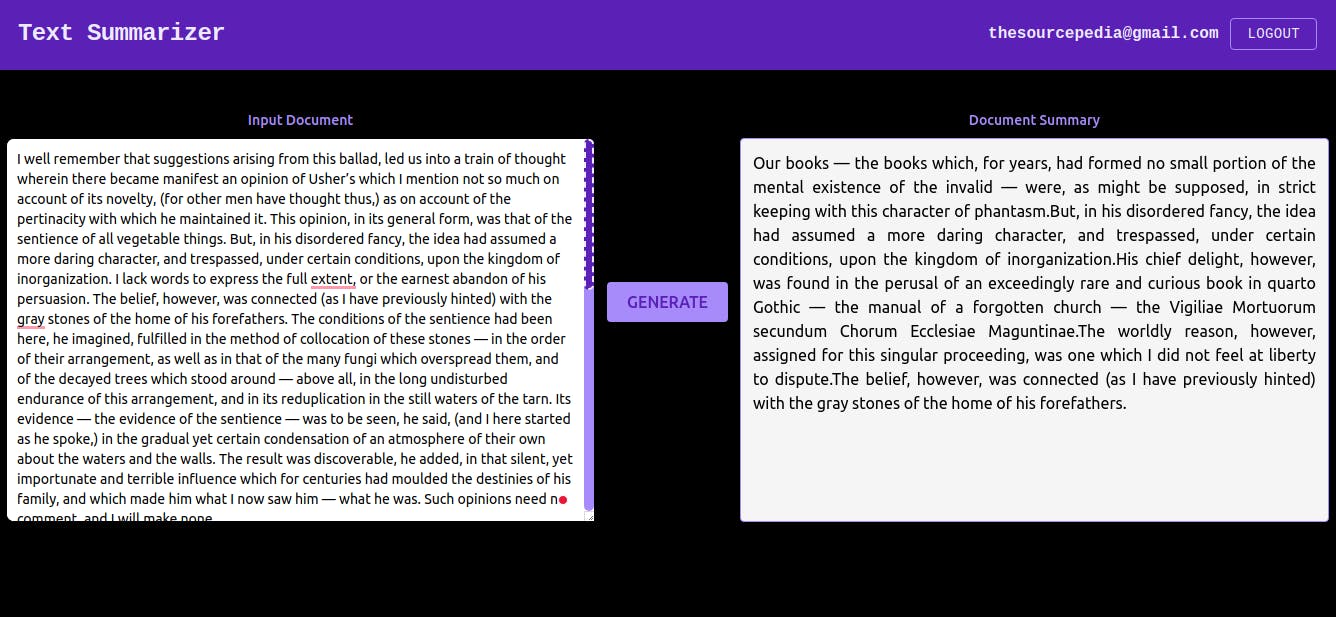
In this, you can customise sentence length, which is passed to the lambda function. Further can customize heapq-nlargest scoring which is currently 5 or change logic or something else.
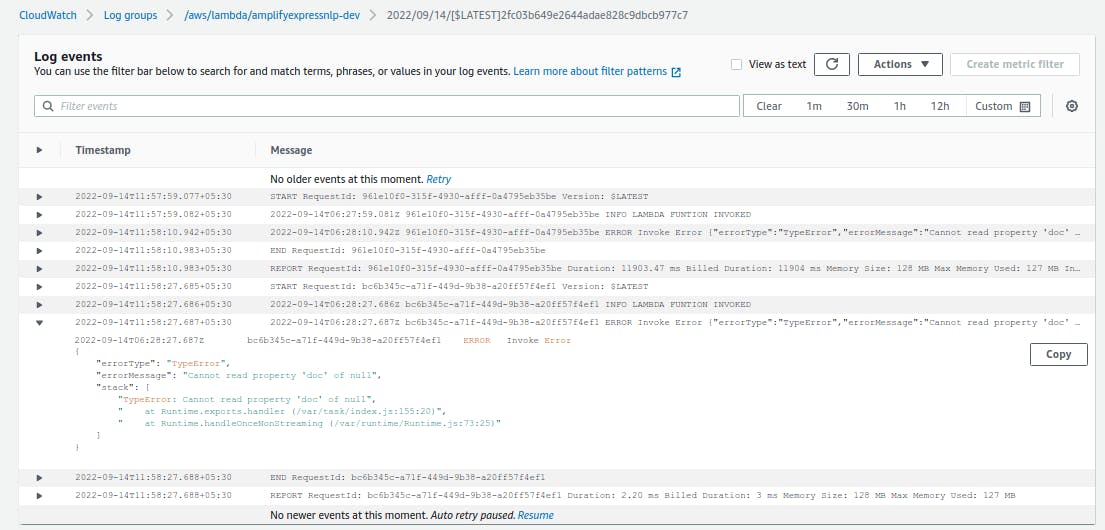
Debug Amplify App with CloudWatch
To monitor your application, API and Lambda function you can use Amazon CloudWatch. In each deployment, a new log stream is created for easier access and monitoring.
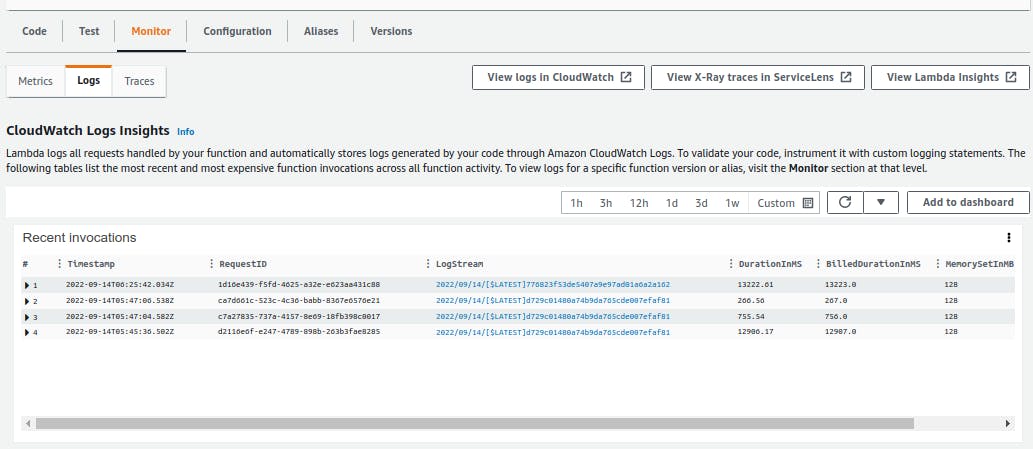
You can see a list of lambda functions and a log of each deployment with a date and time based on the last event.
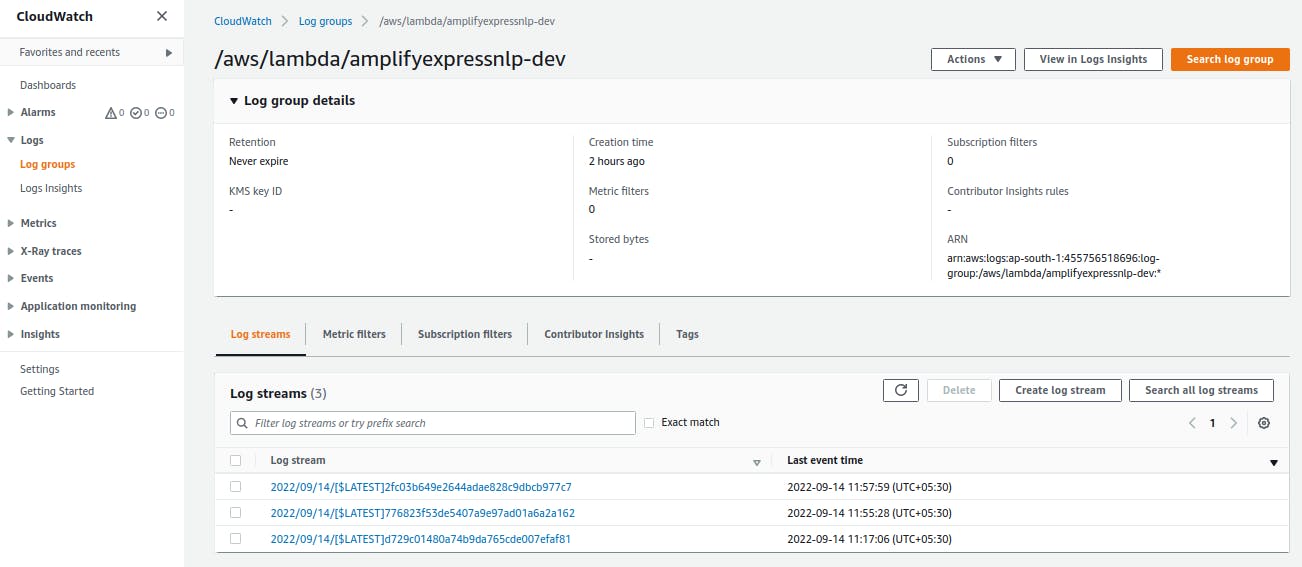
In case of an exception or error, you can get details info from CloudWatch logs that from where the error is occurring what it is and the cause of it. You can also see console logs here written in lambda functions.
Source Code Links and Local Setup
Demo Preview
Clone the repository and go to the project directory.
git clone https://github.com/piyush-multiplexer/ml-with-amplify.git
cd ml-with-amplify
You will amplify CLI to be installed for further operation.
npm install -g @aws-amplify/cli
Configure Amplify Project
amplify configure
This will ask several questions and try to create an IAM role with the chosen region. Once Amplify is successfully configured run amplify push to provision cloud resources and deploy your app. Visit your dashboard and see the preview URL to check if everything is working fine or not.
Conclusion
So in the end we got to know how to use AWS Amplify CLI, Hosting, and UI for building full-stack applications with UI and authentication and set up Amplify REST API and lambda function for Text Summarization. I hope you find this article useful. Please leave a comment if any doubt. Like, comment, share and subscribe.